

Friday, October 12, 2012
Dark Bronze
I'm really loving this super dark patina finish on bronze - something I happened upon by chance by leaving my bronze pieces in liver of sulphur overly long. I can back to find everything completely black like soot. I gently buffed off the high spots and really like the contrast and rich character I found. I then gently added some heat patina to deepen both the bronze highlight and sooty black patina areas. This added to the drama and I'm anxious to try more with this technique.

Thursday, August 23, 2012
New Bronze...
A few new things I have been working on. I will be photographing and listing over the next 2 weeks.
Enjoy!

Enjoy!

Tuesday, July 3, 2012
Making Things...
I admit it: I have a problem. I can't stop making things. LOTS of things. Every kiln load is packed full of objects and forms I am constantly experimenting with. I never have time to list everything so I pick out a few things and list those. I make a lot of one-off designs that I don't plan to make again so I sometimes give those away. Then someone tells me - you know that thing-a-majig you gave me, can you make more? So off I go...
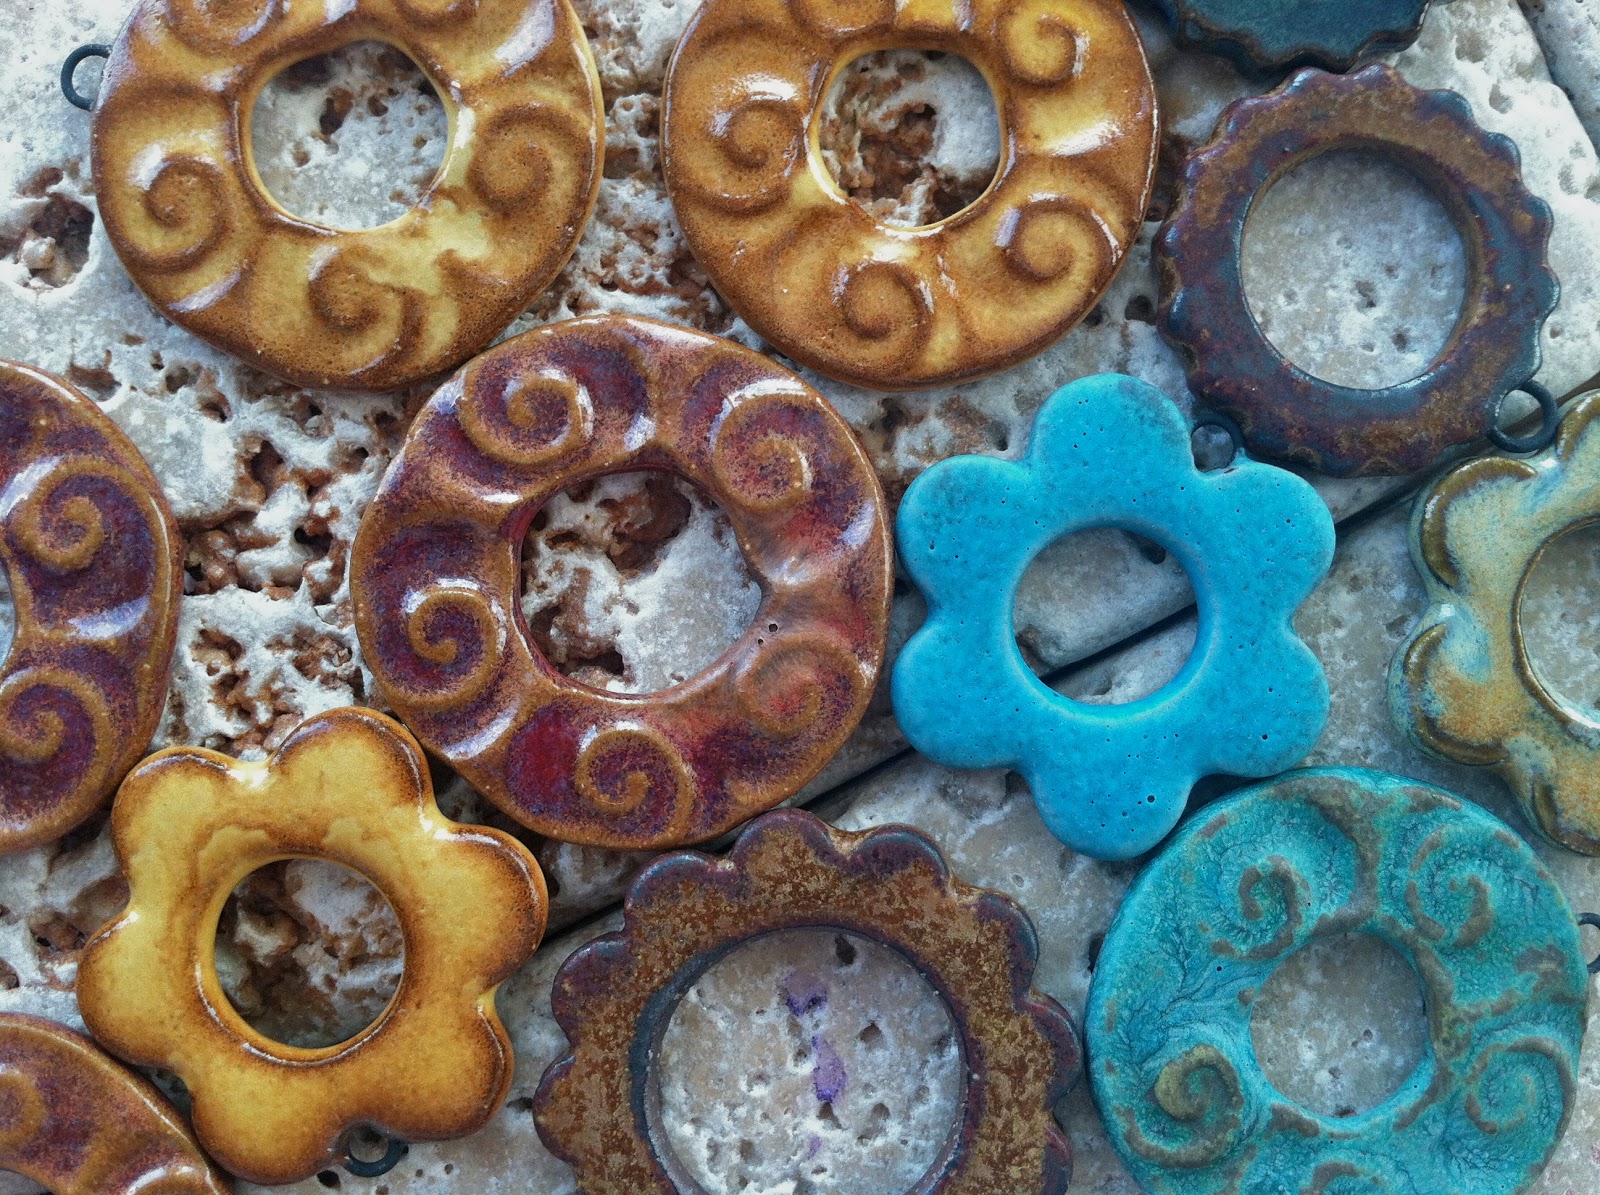
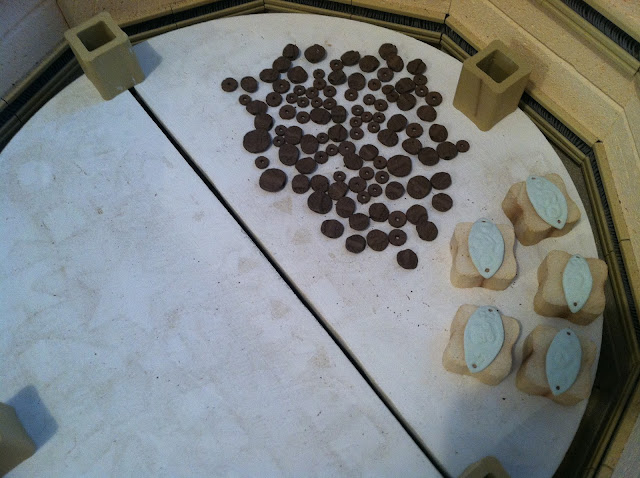
I LOVE exploring shapes and textures - my favorite thing, even more than glazing. Over the past few months I've really been into making discs, rings and hoops. I've been getting more and more primitive in my designs, using bits of sea shells, worn bits of sea glass and pottery shards collected over years of beach combing, and my own hand carved porcelain stamps for texturing. I have tons of these discs and rings that have been sitting around for months. I have decided to start listing them in the next few weeks. Not sure how, maybe in sets of 4 - 6? I'll figure something out...meanwhile here's a few pictures I snapped from a kiln unloading a couple of months ago...


I LOVE exploring shapes and textures - my favorite thing, even more than glazing. Over the past few months I've really been into making discs, rings and hoops. I've been getting more and more primitive in my designs, using bits of sea shells, worn bits of sea glass and pottery shards collected over years of beach combing, and my own hand carved porcelain stamps for texturing. I have tons of these discs and rings that have been sitting around for months. I have decided to start listing them in the next few weeks. Not sure how, maybe in sets of 4 - 6? I'll figure something out...meanwhile here's a few pictures I snapped from a kiln unloading a couple of months ago...


Oh yeah... see those little flower bead caps? I'll be making more of those soon...
Saturday, June 23, 2012
Clay Dings, Bronze Dings, and Copper Dings
In a combination of various design tracks I have been developing - a recent collaboration with Genea of Geneabeads along with research into tribal bead styles, and my own work in a bead style I created called "Ancient Relics", I developed a bead style I am calling "Clay Dings" (with Genea's blessing, I chose the name in homage to her famous "Wing Dings").
My first round were created in stoneware and black raven clay. Then I followed up with this design in copper and bronze clay. Here's a sneak peak...

Look for these and other Clay and Metal Dings in the coming weeks in my shop, including Copper Dings and Bronze Dings with color patina!
My first round were created in stoneware and black raven clay. Then I followed up with this design in copper and bronze clay. Here's a sneak peak...

Look for these and other Clay and Metal Dings in the coming weeks in my shop, including Copper Dings and Bronze Dings with color patina!
Bronze!
For the past couple of months I've been working copper and bronze metal clay and adding patina. I am LOVING the new medium! Here's a sneak preview ...


Friday, June 15, 2012
FiberWire
Did I mention that my daughter Nellie has her own fiber dyeing and spinning business? She just launched it about 6 months ago. More recently she began experimenting with spinning fiber onto wire. I have LOTS of wire in my studio that I use for my jewelry work. Well, she snagged a spool of copper and several of her hand-dyed fibers and the result is a new product I am SO excited about: FiberWire. I'm very proud to offer Nellie's wire in my shop at Starry Road Studio.

Thursday, May 17, 2012


Wednesday, May 16, 2012
Glazing and Firing
I thought you might like a little peak into my glazing and firing process, from start to final loading of kiln. Depending on the size of the load, this can take anywhere from a few days to two weeks. Today's firing took about 5 days to glaze (3 - 4 hours each evening).
I'm particularly excited about this load since it includes several new styles in an african/tribal theme, including Clay Dings and Spool Beads. I can't wait to see how these turn out!
Glazing...


The second shelf contains whatever I couldn't fit on the shelf below - mostly several black raven pieces - once fired to Cone 6, they will become a yummy deep black. :)


I'm particularly excited about this load since it includes several new styles in an african/tribal theme, including Clay Dings and Spool Beads. I can't wait to see how these turn out!
Glazing...

This batch included several pieces in Black Raven stoneware. I am using a technique that involves dipping in white porcelain, then glazing in one of my favorite colors: Hot Coral.


I'm using a similar technique on these little spool beads: first I dot the rims with dabs of white porcelain, then I build up dots of Hot Coral glaze on top of them to create little "bumps".


Next comes the fun part (not!): loading the kiln.
Again, depending on the size of the load (and number of shelves), this can take anywhere from 1 to 3 or more hours. Today's load took about 2 hours, and 1 1/2 shelves.
My bottom shelf sits about 4 inches off the kiln floor - the bottom of my kiln tends to get hotter than the upper areas so I find that this little bumper space helps. As you can see, the bulk of my load is going on this shelf. I also consider this my "cone 6 sweet zone". I leave about 8 vertical inches here - the next shelf will sit on top of the square posts.
After I get everything on racks (at my workbench) I carefully move them to the kiln. Here I am doing some final straightening of gear links - I want these to hang as close to 90 degrees on the hanger bar as possible. I found this helps to prevent twisting and warping during the firing. I am also doing a final check of every single bead and component to make sure they are not touching each other (if they did, they will become permanently fused together) or the sides of racks or other kiln furniture (again, to prevent fusing). Glaze is pretty much glass - you have to think about what it might touch when it is molten - whatever it touches it will fuse to. The insides of beads and hoops are therefore bare clay (not glazed), so that when hung on wire racks they will not fuse to them.


The second shelf contains whatever I couldn't fit on the shelf below - mostly several black raven pieces - once fired to Cone 6, they will become a yummy deep black. :)

I top off the load with a "cap shelf" to help contain the heat within the loaded shelf zones below. Its kinda like making a sandwich with the shelves - the top and bottom shelves help to hold the heat in the zones where the glazed ware is stacked.


That's it - I started the kiln up at about 8:30 pm. Tomorrow I get to open it up and see what I got! Stay tuned!
Saturday, May 5, 2012
Searching for the White Whale
Back to the Sea...

I have been working on my little whales for some time now. Until now these have only gone to friends and private sales. I am gradually introducing them to the public. You will begin to see these in my shop over the next few weeks.
Each whale I create is precious to me, as though there is some little spark of life in each one, each with a slightly different expression and form. I am particularly fond of my ivory and white whales: I call this series "Moby". He will be swimming over to my shop later this week. Right now I believe he is somewhere off the coast of Nova Scotia playing with him fellow whale friends.


Other whaley friends are not far...


Wednesday, April 25, 2012
Asymmetry
I just had to share these gorgeous earring designs by Staci Louise Originals - all featuring a number of my Ancient Earth Relics and Star Link components...
I love her use of asymmetry for a truly primitive "found objects" feel - like treasures gathered on an archeological dig - so provocative and inspiring...


I love her use of asymmetry for a truly primitive "found objects" feel - like treasures gathered on an archeological dig - so provocative and inspiring...


Subscribe to:
Posts
(
Atom
)